Why to Create Boundary?
Boundary is a network location on the intranet where the device that we are planning to manage is present. It is not possible to use boundary without creating boundary group.Boundary group is nothing but collection of boundaries.Usually SCCM clients will identify the assigned site and download location (distribution point) by using boundaries when automatic site assignment is enabled. Boundaries can be created by using below options.
- Active Directory site
- IP subnet
- IPv6 Prefix
- IP address range
It is always preferred to go with creation of Active Directory site boundary , the least option should be the creation of IP Range Boundary, because the query associated in finding members of the IP range boundary will always use high memory when compare with other options.
From Technet
To support site assignment, you must configure the boundary group to specify an assigned site for clients to use during automatic site assignment. To support site system servers, you must specify one or more site systems. Prior to System Center 2012 Configuration Manager SP2, you can only specify site systems with the distribution point or state migration point site system role. With System Center 2012 Configuration Manager SP2 or later, you can also specify management points. Both the site assignment and site system server configurations are optional for boundary groups.
When you plan for boundary groups, consider creating one set of boundary groups to associate site system servers and a second set of boundary groups for automatic site assignment. This separation can help you avoid overlapping boundaries for site assignment. When you have overlapping boundaries and use automatic site assignment, the site to which a client is assigned might be unpredictable.
How to Create Boundary?
Select Administration → overview → Boundaries
Select Create Boundary

Specify the type of boundary, you are planning to create.
Here, I choose Active directory site boundary for my lab setup.
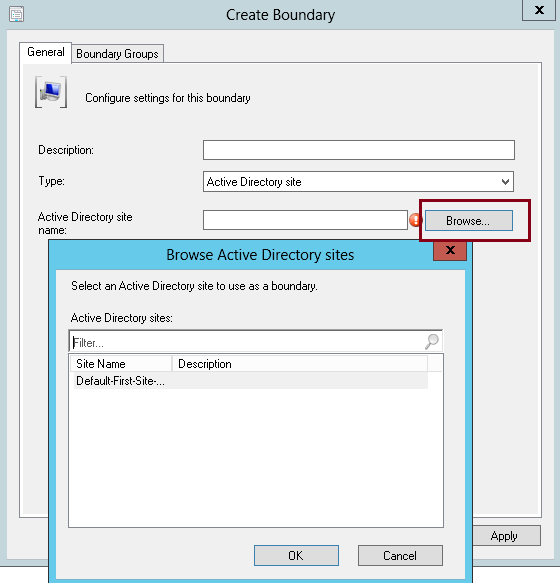
Browse the AD site name and click ok

Now we are done with boundary creation .
Next we will create new boundary group and associate the newly created boundary with the new boundary group.
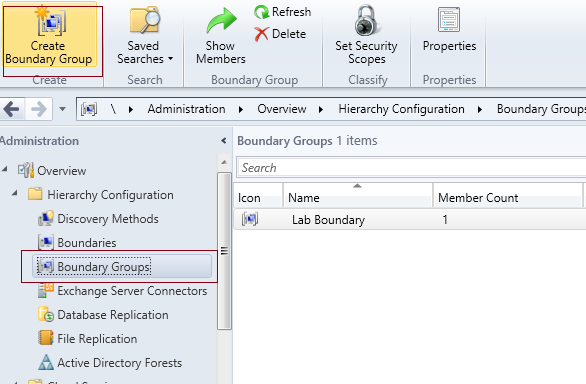
How to Create Boundary Group?
Select Administration → Boundary group → Create Boundary group
Provide the name for your Boundary Group, select boundaries to add to this boundary group. As per my lab setup, I have selected AD site boundary. You must specify the boundary that you want to add to the boundary group.

Once added the boundary, select Alternate tab References
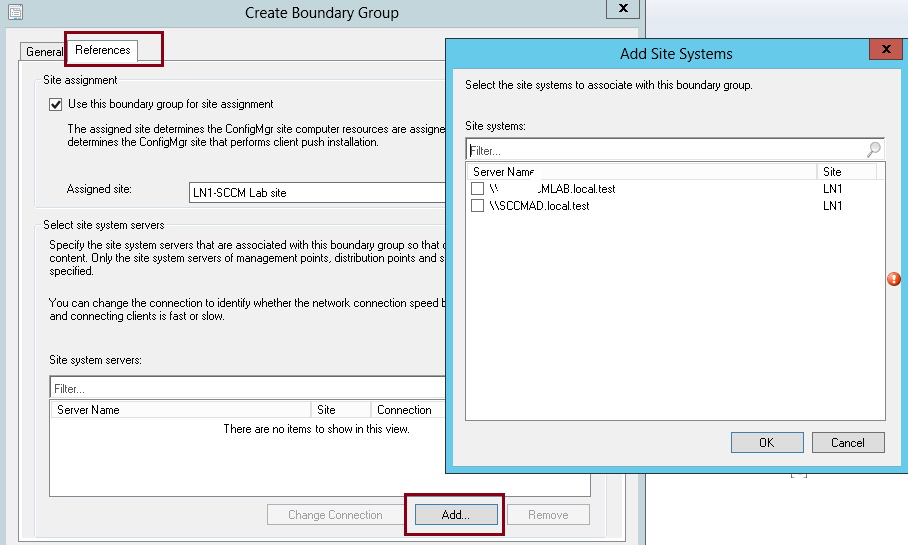
Add the site systems (Distribution Point, Management point, State Migration point) that are associated with the boundary group you are creating.
Click Ok. Now we are ready with Boundary group and site system associated with the boundary groups.


